Official Experimentation Day 1 was a success!
In this post, the first of several, I (Bonnie) will discuss how we went about getting started, and the results of our attempts to make yellow, purple, and shell gold in the manner of medieval pigment-makers. (Roma will make some follow-up posts soon to talk about what we did with red, green, and blue!)
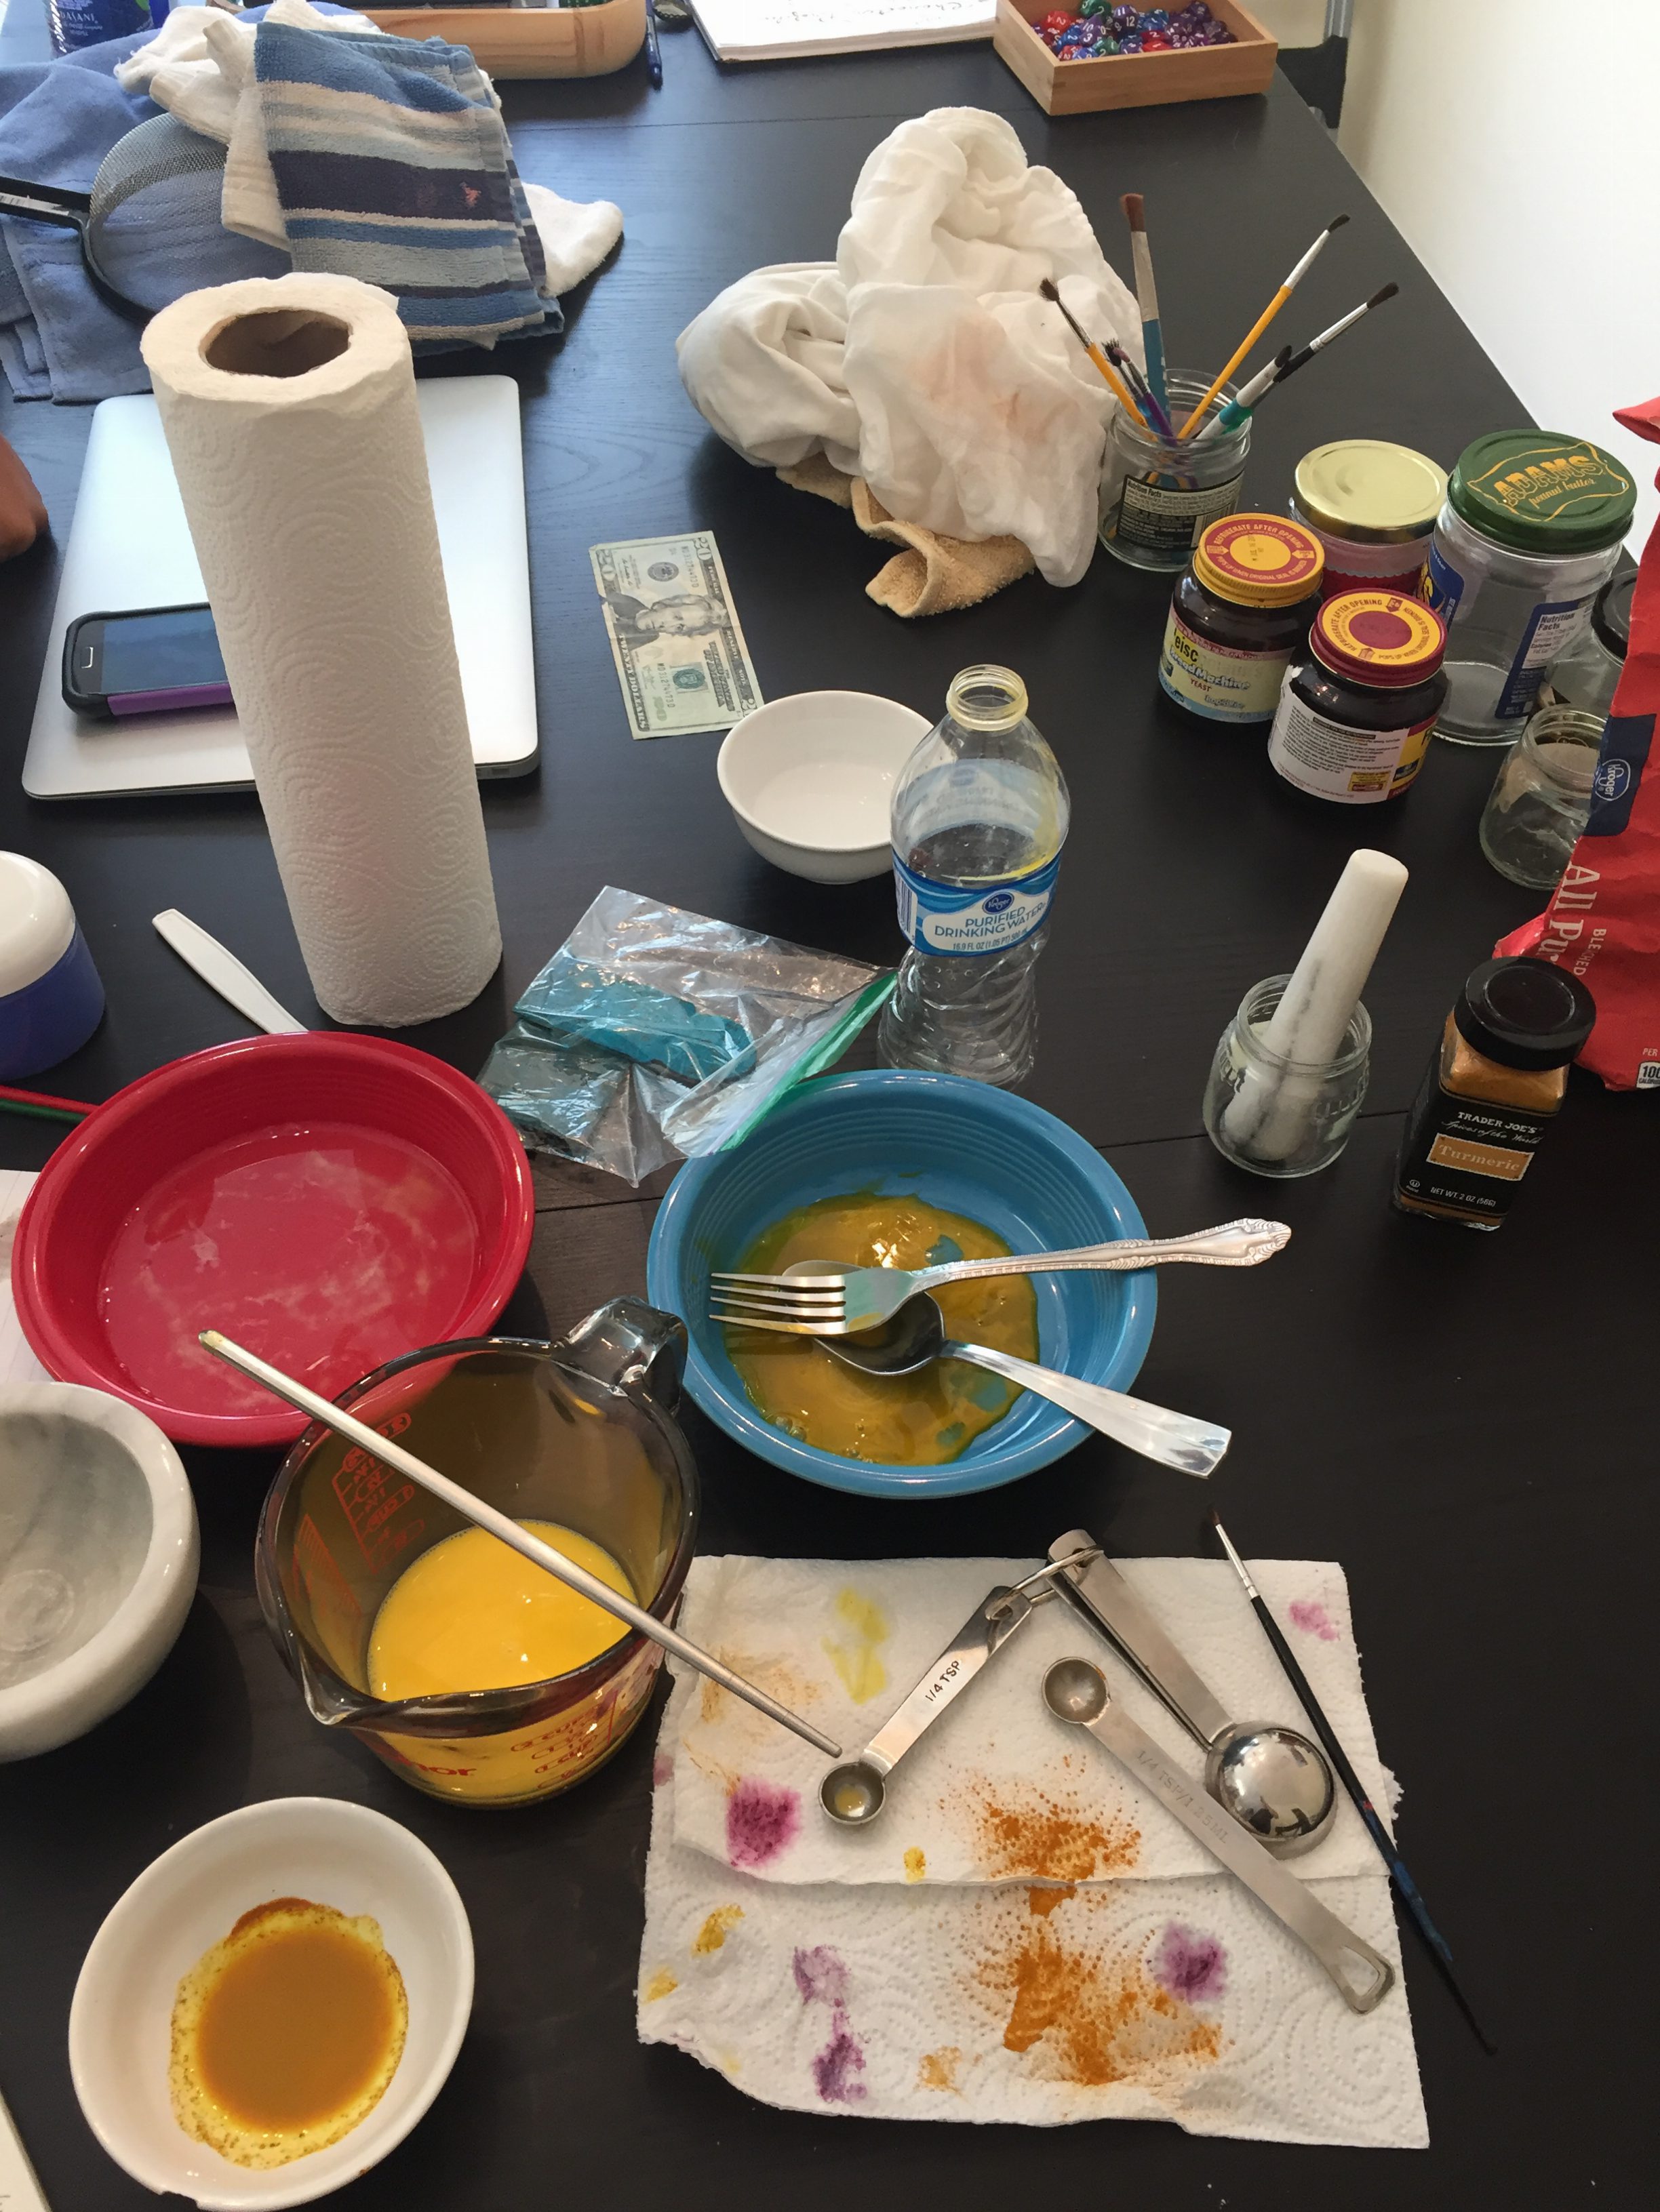
Last Sunday, Roma and I met at my house for a few hours, bringing together all the materials that we and Dr. Camp have been collecting the last few weeks for this project. We had a variety of organic and inorganic pigments (or things with which we were going to make pigment), as well as fresh eggs from a farmer’s market to make our egg binders.
The binders were our first step: we used a neat trick we saw online in which you take an empty plastic water bottle, squeeze it, and then touch the lip to an egg yolk (after you’ve cracked an egg and spread onto a plate!). You then release the pressure and the yolk is “slurped” up into the bottle intact, leaving the egg white behind – voila! You are then free to deposit the egg yolk in a separate container, which is what we did. After adding equal parts water to our egg white and egg yolk and mixing, we had two different binders ready to test!
Yellow
We had two different ways of making yellow – yellow ochre pigment (inorganic) and ground turmeric, an organic spice that we already had at home for cooking.
Yellow ochre is an “earth pigment”, a pigment mined from the earth and used with little processing. These pigments were popular in the medieval period because they were cheap, easy to make, and did not tend to react with other pigments. If we were starting just from the step of taking this mineral from the earth, we would have purified it by mixing with water and letting settle, allowing us to extract impurities (from the top, or bottom in case of sand) and eventually leaving only the pigment.
Turmeric is an organic pigment, meaning it starts as a plant similar to ginger, and the spice we have here was made by grinding the root of the plant into a fine powder.
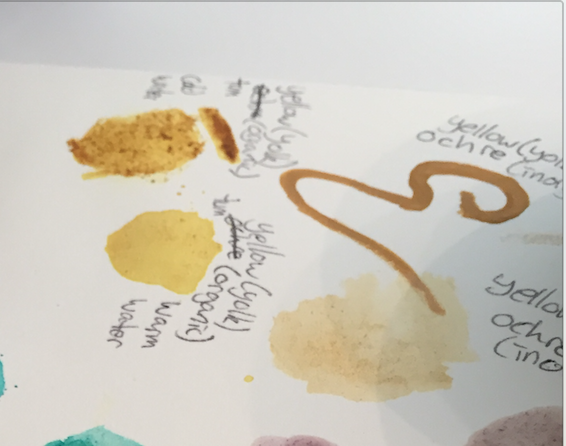
Our very first mixture was quite simple, just equal parts yellow ochre powder with egg yolk, and the result was excellent! It had a good consistency for painting, not too thick or thin with a smooth glide. The color, as you can see in the picture (top right), is a bit dark, but we believe that could be adjusted with a ratio of more yolk than powder, perhaps 2:1 instead of the 1:1 we used (something to try next time!). Egg white turned out less successfully for yellow ochre (see bottom right) – it isn’t unpleasant and has a nice shade, but the thin consistency made it harder to paint with.
Turmeric, on the other hand, turned out to be the opposite as far as binders went. We followed the same process of mixing a small amount of ground turmeric with about an equal amount of egg yolk and egg white (separately!), but the result with egg yolk was less than impressive, being a gross mustard color with lots of “grains” (from the turmeric) still visible (top left). With the egg white attempt, though, we hit upon the idea of adding some hot water to the mixture, which helped dissolve the turmeric and gave a much cleaner, prettier yellow (bottom left).
It is likely that adding hot water to the egg yolk would have had the same result, so the main point here is to make sure you use hot water to mix products like turmeric (which may not start very finely ground) with binders.
TL;DR – Egg yolk is better for yellow ochre powder (but use more yolk than powder), either fine for ground turmeric but mix with hot water
Purple
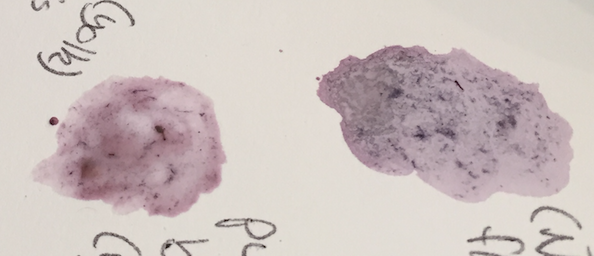
We only had one dedicated method for this one, namely blackberries! We were working off of a website discussing how to make dye pigments from plants. We had also intended to try to mix purple ourselves using blue and red (scroll down to purple) once we made them, but as you’ll read in part 2 of this post, our grand plans for red did not go exactly to script. Moreover, the blackberries can really only be called a moderate success. You can see that the color when done with egg yolk turned out to be a pleasant sort of lavender (right), but the juice of the blackberries (we crushed two of them in the mortar & pestle and added binder) made a thin consistency that was difficult to paint with.
We tried to thicken the consistency by adding flour to both types of mixtures, but this made no noticeable improvement (left in pictures is egg white with flour added). We do think, though, that the watercolor look of the result could well be something that someone might desire for some uses, so we would not call our purple experiment a total loss.
TL;DR – blackberries make a nice watercolor-like purple but the consistency is too thin to be a good pigment
Shell Gold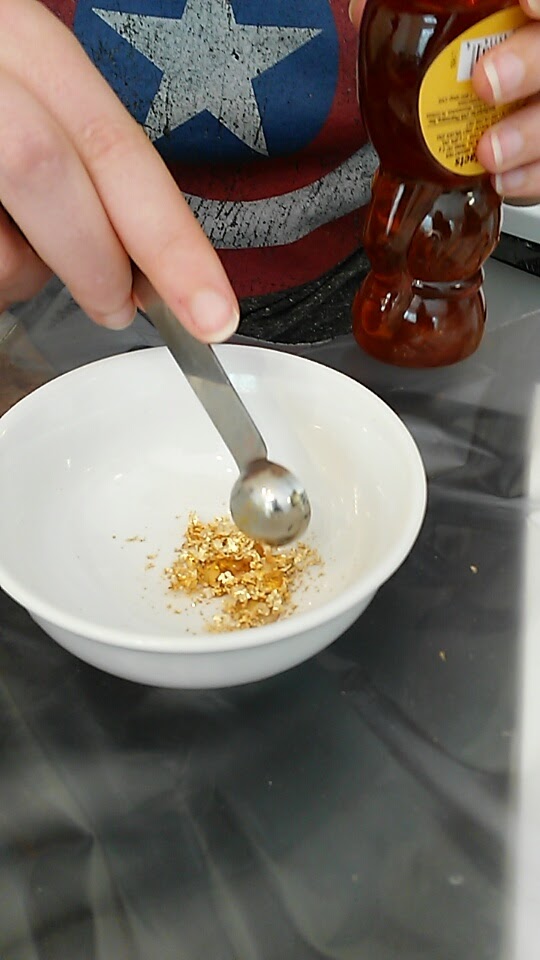
Sigh. This is the experiment I was most excited for, but it sadly did not turn out the way I’d hoped. We followed a recipe I had found online in which you take a sheet of gold leaf, ground it in the pestle, mix in a bit of honey and a bit of salt, then transfer the whole goopy mixture to a small glass jar.
After adding some water and letting settle, you are supposed to be able to siphon off the water, and then repeat the water-settle-siphon cycle until the water stops tasting either salty or sweet. At that point you can mix with a binder and paint as normal, but with gold flakes to make a gold paint. This was an unusual method of applying gold during the medieval period (they usually used a burnishing method), but my reading indicates they did employ it occasionally.
That was the IDEA anyway – in practice, the mixture of honey/salt/gold flakes was very hard to move around, and the “settling” process just didn’t seem to happen. The result was a sad sort of gold-ish goop that did not want to mix with a binder at all, so we had to set aside this idea. Our plan is to still offer gold leafing to the students when we teach Dr. Camp’s FYOS class, but simply bring the glue and materials that you need for normal usage of gold leaf, so that anyone interested can still have that flourish to add to their creations.
TL;DR – shell gold mixture is a no-go, we will just offer the leftover gold leafing to the students if desired
That’s all for now, folks! Look forward to more updates coming very soon from my wonderful partner Roma, and as always, thanks for reading!
Update: here are the links to Roma’s posts!
Adventures in Pigment-making, part 2.1