
Depending on your theme, your WordPress site may have space for a banner. You can choose to create your own and upload it to your site. Your banner should be under 2MB in size, and ideally the exact dimensions specified by your theme. If the image you upload is not perfectly sized, WordPress will let you crop it to fit.
Navigate to Appearance
Go to your Dashboard. Hover over Appearance in your left navigation menu.

Go to the Custom Header Page
Click on Header. Note the dimensions listed on the page (in this example, 1280 x 200 pixels). For best quality, your header image should be this size. To upload an image from your computer, click Browse.
Select and Upload
Select the image you want to use for your banner. Once it’s selected, click Upload.

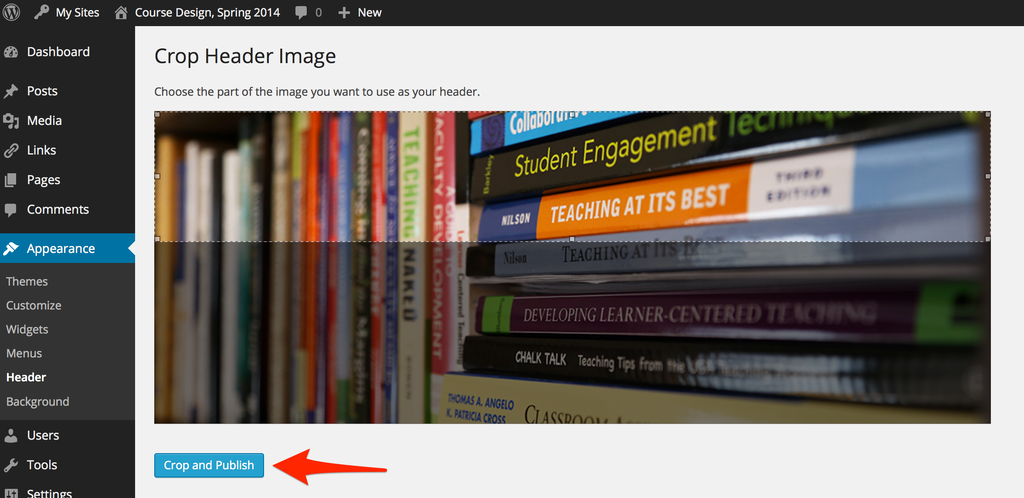
Crop and Publish
If your banner isn’t the correct size for the header area, you will be prompted to crop your image. Drag the cropping box to the area of the image you want to keep, and then click Crop and Publish.
Success! Your new banner is now applied to your site.